Diy Dog Agility Course: Fun Training For Fido
A dog agility course is an obstacle course designed for dogs to run through for exercise, training, and fun. An agility course typically includes equipment like tunnels, jumps, seesaws, weave poles, and A-frames that dogs must navigate. Training and competing on an agility course provides many benefits for dogs.
Agility training provides physical and mental stimulation for dogs (https://www.hillspet.com/dog-care/play-exercise/dog-agility-training). The variety of obstacles and commands keeps dogs engaged and focused as they maneuver through the course. It allows high-energy dogs to burn off excess energy in a productive way. Agility also helps build confidence in dogs as they learn new skills and master each obstacle (https://vcahospitals.com/know-your-pet/agility-for-dogs). Completing a course successfully gives dogs a sense of accomplishment.
In addition, agility helps improve a dog’s conditioning, coordination, and responsiveness to commands (https://highlandcanine.com/benefits-of-dog-agility-training/). Jumping, climbing, weaving, and balancing on equipment builds muscle strength while improving agility. Dogs learn to listen closely and respond promptly to handler cues on the course. Overall, agility provides wonderful bonding, training, and exercise for any energetic canine.
Supplies Needed
To build your own DIY dog agility course, you’ll need some common agility equipment and supplies like:
- Jumps – These can be made from PVC pipes and planks of wood. Start with a few jumps of varying heights. According to jjdog.com, competition-level jumps are 4-5 feet wide.
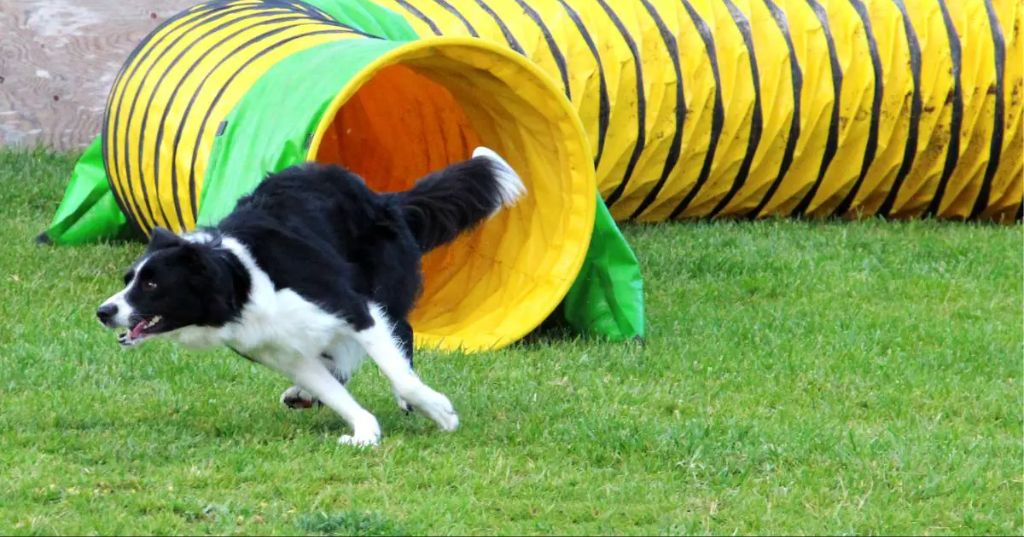
- Tunnels – Build or buy collapsible tunnels made of durable fabric. Tunnels should be around 3-6 feet long. Get tunnels in different sizes based on your dog’s size according to Clean Run.
- Weave poles – Use PVC pipes or wooden dowels inserted into a base. Start with 6 poles spaced around 18-24 inches apart and build up to a full set of 12. Reference competition spacing from jjdog.com.
- Seesaw – Build a center-balanced plank using wood and PVC pipe for the pivot. Cover the walking surface with a non-slip material. A 12 foot long plank is a good starter size.
- Pause table – Use a sturdy table or large wooden platform covered with a non-slip surface. Make sure it’s stable and won’t tip.
- Agility paint – Use tape, chalk, or non-toxic paint to mark obstacles and lines on the ground.
- Treats – Bring high value treats to reward and motivate your dog during training.
Shop for new equipment or DIY using PVC, wood, and other household items. Reference competition specifications so items are regulation size. Adjust sizing down for very small dogs.
Creating the Course
When creating your DIY agility course, it’s important to think carefully about the layout and flow. Here are some tips:
- Make sure there is enough space between obstacles for your dog to maneuver. AgilityNerd recommends at least 15-20 feet between obstacles.
- Create a logical flow through the course that allows your dog to move smoothly from one obstacle to the next. Arrange obstacles in a winding path rather than a straight line.
- Alternate high and low obstacles to create variety. Mix in some curved paths rather than only straightaways.
- Place obstacles with openings (like tunnels) strategically so the dog can approach the entrance easily.
Safety should also be a top priority when designing a home agility course. Here are some key considerations:
- Only use sturdy, secure equipment that won’t tip or move when in use. Solidly anchor or stake down any elements.
- Include a solid and level runway area for practicing at full speed. Avoid rocks, holes, and uneven terrain.
- Make sure there is nothing dogs can run into or under and injure themselves around the obstacles.
- Don’t make jump heights too high or dogs could get hurt. Adjust for your dog’s size and ability.
- Allow ample run-out areas after jumps and obstacles so dogs can slow gradually.
With some thoughtful planning, you can create an agility course layout that is challenging yet safe for your pup!
Training Overview
When getting started with agility training, it’s important to focus on foundation skills before attempting to run a full course. According to the AKC, you’ll want to start by building confidence and teaching basic commands like “sit,” “stay,” “come,” and “heel.” Work on having your dog walk calmly beside you, respond promptly to commands, and focus their attention on you. The AKC also recommends starting with low jump heights and short distances between obstacles to avoid overworking young or new agility dogs.
Once your dog understands the individual obstacles and has developed focus and confidence on the course, you can start piecing together sequences with multiple obstacles in a row. Keep the sequences short at first. Reward your dog frequently during training sequences. As your dog masters shorter sequences, begin expanding the number of obstacles in the sequence. Eventually, you can practice full courses, but don’t expect perfection at first – be patient and celebrate the small wins!
According to The Spruce Pets, it’s important to start slow and keep training sessions short and fun during the foundation building process. They recommend 5-10 minute sessions for very young dogs or puppies. Work up to 15-20 minute sessions for adult dogs new to agility training. Always end on a positive note rather than trying to drill a sequence until it’s perfected.
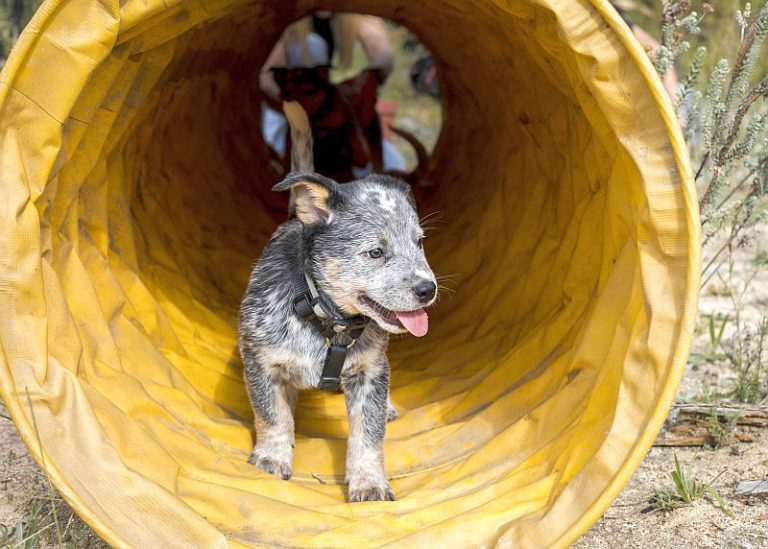
Teaching the Tunnel
One of the most fun pieces of agility equipment for dogs is the tunnel. Teaching your dog to confidently run through a tunnel requires patience and positive reinforcement. Start by letting your dog get comfortable with the tunnel. Allow them to walk around it, sniff it, and explore at their own pace.
Next, toss a treat just inside the opening of the tunnel so your dog reaches their nose in to get it. Gradually toss the treats further into the tunnel so your dog has to step inside more to get the reward. If needed, use a target stick with a treat on the end to lure your dog through the tunnel the first few times.
Once your dog is comfortably running through the full tunnel, start asking for the behavior on cue. Say “tunnel” right before they run through, then reward. After 10-15 successful repetitions, say your cue from a few feet away from the tunnel entrance. Only reward your dog when they enter the tunnel immediately after hearing the verbal cue. Be patient and consistent, and soon your dog will be racing through the tunnel whenever you give the word!
For more on training the tunnel exercise, see this step-by-step guide.
Teaching the A-Frame
The A-frame is one of the more challenging obstacles for dogs to learn. It requires confidence, coordination, and proper form to ascend and descend safely. Start by lowering the A-frame to its lowest setting, ideally with the apex just 2-3 feet off the ground.
With the A-frame set so low, lure your dog up and over with a treat. Praise and reward heavily once they go over the top and reach the bottom. Repeat this process until your dog is willingly running up and down the lowered A-frame. Gradually increase the height over multiple training sessions as your dog gains confidence.
Teach your dog to hit the contact zones – the bottom portion of the A-frame ramps. Have them pause and touch their back feet on the contacts before releasing them to continue. This teaches proper form and technique. Mark and reward each time they correctly hit the contacts. Contacts are crucial for safety, allowing the dog to gather themselves before moving on.
Avoid letting your dog jump off the side of the A-frame, as it can cause injury. With patience and positive reinforcement, they will learn to run the A-frame correctly. Check out more tips at [https://spiritdogtraining.com/agility/a-frame/]. With time, the A-frame will become one of your dog’s favorite obstacles!
Teaching the Seesaw
Teaching your dog to properly and safely use the seesaw requires patience. Unlike other agility equipment like jumps, the seesaw requires balance skills that must be slowly built up over time. Start by leaning the seesaw against a secure object at a very low angle. Reward your dog for putting his front paws up. Over many short training sessions, gradually increase the angle. Teach your dog to wait for your release command before going over the seesaw. Reward four-footed position and slow descents. According to Alpine Publications, the best way to teach the seesaw is to show the dog that he has control of the board.
Teaching Jumps
Teaching your dog to properly jump agility obstacles is an important foundation skill. Start by setting the jump bar very low to the ground to build confidence. Use lots of encouragement and rewards to motivate your dog and create drive towards the jump. According to one expert source, “When your dog jumps up, give him a treat. Spend about 5-10 loving on him. Then repeat a few times. Then you are ready to teach him to sit on the table and give a high five” (source).
Focus on teaching your dog proper jumping form – they should jump with their body straight and all four feet together. Do not allow them to take the jump at an angle. Gradually increase the height as your dog develops muscular strength and coordination. Keep training sessions short and fun. End on a positive note when your dog is still eager to practice. With patience and consistency, you’ll have a champion agility jumper in no time!
Teaching the Weave Poles
One of the most challenging obstacles for dogs to master in agility is the weave poles. Teaching a dog to weave through a set of poles requires patience, consistency, and using proven training methods. There are several techniques commonly used by agility trainers to teach the weaves including the 2×2 method, channel weaves, and weave-o-matics.
The 2×2 method starts by setting up just two poles in a straight line spaced about 2 feet apart. With a target or lure, guide your dog in and out between the two poles, then gradually increase to three poles, then four, building up to a full set of weave poles as your dog masters each incremental step. This layered approach helps dogs understand the weaving pattern and body movement required (Spirit Dog Training, 2021).
Channel weaves involve placing guides, like plastic rails or boards, alongside the weave poles to create channels that force the dog into the proper entrance and teach them to keep forward momentum. As dogs improve, the guides are gradually removed to transition them to freely weaving the pattern. Channel weaves teach focus and build confidence for novice dogs (Carlson Agility, 2021).
Weave-o-matics use adjustable angled poles to simplify the weaving motion for dogs. Starting with the poles slanted, dogs can easily zig-zag through. As dogs progress, the poles are straightened to the vertical position. Weave-o-matics build muscle memory and teach dogs to drive forward and stay straight within the weaves.
With any training method, giving dogs lots of positive praise and rewards will help motivate them to keep practicing this complex agility skill. Weave pole training takes time and daily practice, but using proven techniques will set your dog up for success on this obstacle.
Conclusion
Building a DIY agility course and training your dog provides many benefits for both you and your pup. For dogs, agility provides mental stimulation and helps improve focus, coordination, confidence, and bonding with their owner. It also provides much-needed physical activity to keep your dog fit and healthy. For owners, training agility is a fun way to actively engage with your dog and strengthen your relationship. It also helps you learn more about your dog’s personality quirks and training needs.
If you enjoyed making an agility course and working with your dog, there are many additional resources to continue training. You can find local agility clubs, competitions, and trainers to take your dog’s skills to the next level. Buying additional equipment like teeters, weave poles, pause boxes, and jumps can help you expand your homemade course over time. There are also many books and online resources with advanced agility training tips. With continued practice and positive reinforcement, you and your dog will get years of enjoyment from agility!