Diy Agility Equipment: Budget-Friendly Fun
Dog agility equipment provides physical and mental stimulation for dogs through obstacle courses that mimic the types of challenges dogs would face in the wild. Agility training strengthens the bond between dog and owner and boosts dogs’ confidence, focus, and listening skills.
DIY agility equipment is a budget-friendly alternative to expensive commercial equipment. Building your own obstacles allows you to customize the equipment to your dog’s needs. DIY equipment is also great for backyard courses since it can be easily disassembled or left outside.
This guide will walk through constructing common agility obstacles like jumps, tunnels, teeter totters, pause tables, and weave poles. With some simple materials and basic tools, you can create professional-quality equipment tailored specifically for your pup!
Needed Materials
To build the agility equipment at home, you’ll need some basic supplies like PVC pipe, connectors, tape, etc. This Old House recommends getting the following materials:
- 1-inch PVC pipe – used for jump uprights and weave poles
- 1.25-inch PVC pipe – used for jump crossbars
- PVC connectors – T-joints, elbows, and endcaps
- PVC primer and cement
- Duct tape or electrical tape
- Sandpaper
- Spray paint
You’ll also need tools like a PVC cutter, drill, and hacksaw. Start by gathering these basic supplies first before moving on to building the individual equipment pieces.
Building Jumps
Jumps are a staple of any agility course. They help dogs improve coordination and jumping skills. You can make basic bar jumps out of PVC pipe cut to 4-5 foot lengths. Be sure to stripe the PVC bars with paint for increased visibility. The uprights can be made from wood or PVC pipe at least 32″ tall and 1-4 inches wide. Insert cups on the uprights for the bar to rest in, sticking out no more than 4 inches so they don’t snag (Source).
For the jump feet, take two 9 inch pieces of PVC pipe and insert them into a 4-way PVC connector. Repeat for the other side. Connect the feet to the uprights using more small pieces of pipe. Make sure jumps are solid yet collapsible if bumped. Painting jumps bright colors also increases visibility and fun (Source).
In addition to bar jumps, you can make hoops from hula hoops or flexible tubing bent into circles. Start small and low to the ground, then increase size and height as your dog’s skills progress. Make sure hoops are visible with tape, paint, or attachment to a base. Always monitor jumping to avoid injury.
Weave Poles
Weave poles are a fun way to build agility and coordination in dogs. Building affordable weave poles at home is easy with some PVC pipe. The key is using the right diameter PVC pipe and connectors to create a stable base. Many people recommend using 1⁄2” or 3⁄4” PVC pipe for small to medium dogs and 1” pipe for large dogs (1).
Cut twelve 3-4 foot sections of PVC pipe for the poles. Then use T joints to connect the poles to a top and bottom PVC pipe that runs horizontally. This creates the ladder-like shape of the weave poles. Make sure to leave a 1-2 inch gap between the ground and bottom PVC pipe so the poles are raised off the ground. Spacing between poles should be about 24 inches (2).
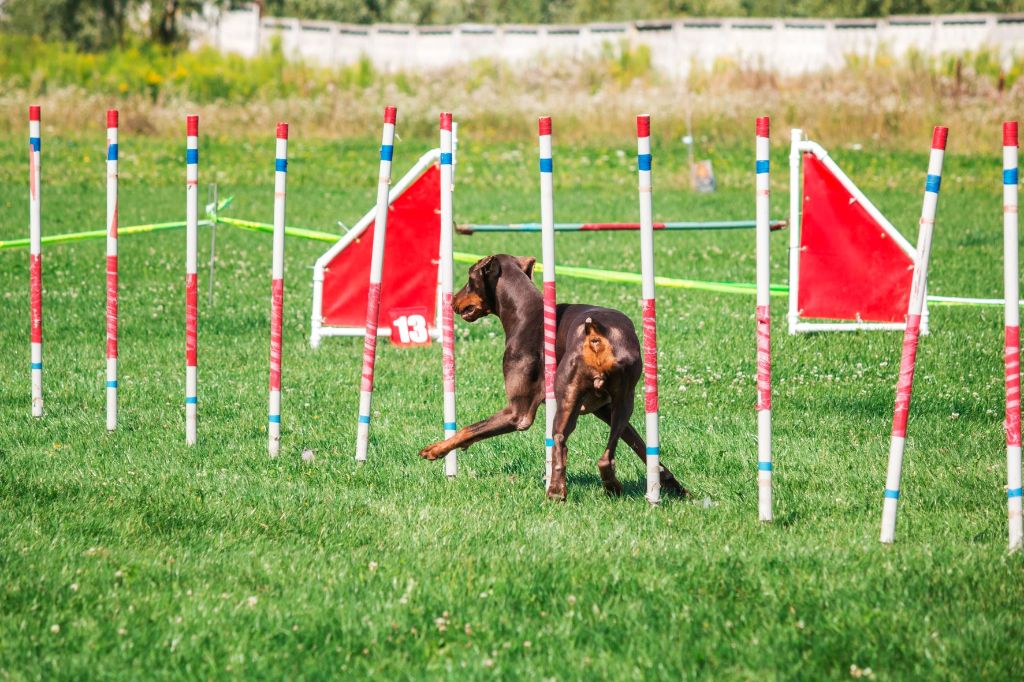
To help guide your dog through the weave, add dowels through the top PVC pipe over each pole. Angle these dowels towards the next pole. You can also thread paracord or something similar through the poles to create a more clear path. Painting the PVC pipe with bright colors will make the poles more visible and fun!
Weave poles allow you to practice important skills with your dog. Make several sets at different widths as your dog progresses.
(1) https://formufit.com/products/pvc-dog-agility-weave-poles-plan
(2) https://animals.mom.com/how-to-make-pvc-weave-poles-12163889.html
Tunnels
Tunnels are a fun agility obstacle for dogs to run through. You can make your own using PVC pipe or fabric. Here are some DIY tunnel instructions:
To make a PVC pipe tunnel: Cut 6-8 pieces of PVC pipe to your desired length and diameter. Connect them together using PVC joints to form a tunnel shape. You can use connectors or duct tape to attach a tarp or plastic sheeting over the PVC frame to form the tunnel cover.
For a fabric tunnel: Cut fabric into a long rectangular shape. Sew the edges together to create a tube. Attach hoops or flexible poles inside to help the tunnel hold its shape. Place sandbags or weights around the edges to keep the tunnel from moving.
Make sure the tunnel opening is big enough for your dog. Add fun textures inside like bubble wrap for noise. Decorate the outside with colorful fabric. Place the tunnel on flat ground and be sure to monitor your dog using it to avoid injury.
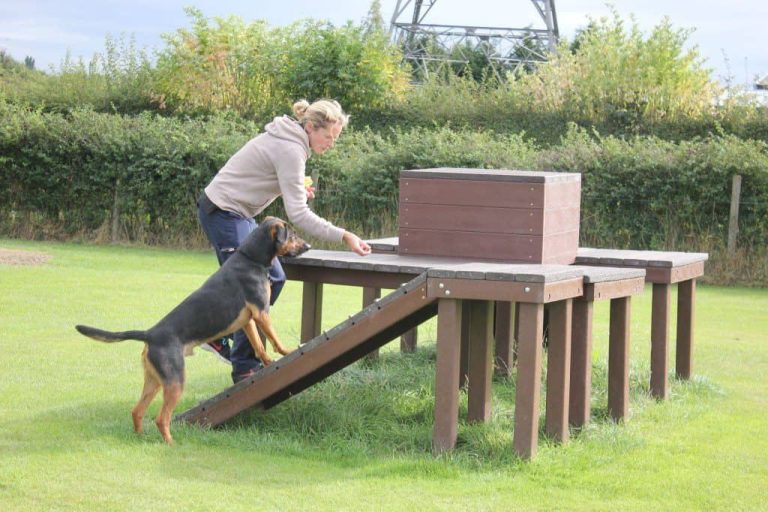
Building an A-Frame Ramp
An A-frame ramp is an essential piece of agility equipment that allows dogs to run up one side and down the other. This ramp helps build confidence and strength. When building your own A-frame at home, there are some key tips to keep in mind.
First, use plywood cut into two 4′ x 8′ sheets and then cut down to 3′ x 8′ for the ramp surface (Source). Screw wooden rungs onto the ramp about 1 foot apart for traction (Source). Make sure to sand the wood smooth so it’s not too slippery. The angle of the A-frame when assembled should be between 90-120 degrees.
For safety, attach anti-skid tape along the ramp length. Consider adding side barriers as well to prevent falls. Place the A-frame on level ground and securely stake it into the ground. Inspect regularly for stability, splinters, etc.
Building your own A-frame ramp allows you to customize the size and adjust the angle as needed for your dog. With some basic construction skills and materials, you can create a cost-effective ramp for agility training at home.
Teeter Totter
A teeter totter, also known as a seesaw, is a classic piece of agility equipment that dogs love. Building your own on a budget is totally doable with some PVC pipe and plywood.
For the base, cut a piece of 2×4 inch wood to the desired length for the seesaw. According to WikiHow, a good length is 4-5 feet long. Screw an upright support piece of wood into the base. Ensure the base is sturdy and anchored (https://www.wikihow.com/Build-an-Adjustable-Dog-Agility-Seesaw).
Use 1 inch diameter PVC pipe to construct the ramp section. Cut two equal lengths and connect them together into a wide V shape using PVC elbow joints. Glue the joints for stability. For the ramp surface, cut a piece of plywood or wood to fit over the PVC ramp.
Attach the PVC ramp securely to the wood base using screws or more PVC fittings. Add a rubber mat or artificial turf to the ramp for grip. Adjust the seesaw to the proper height and angle by varying the length of the support leg.
Always supervise your dog on the seesaw and start low to the ground. Make sure ramp edges are smooth and round for safety.
Pause Table
A pause table is one of the key pieces of agility equipment. The pause table provides a space for the dog to stop and wait during a course. According to DIY Dog Agility Platform! – The Ruly Bully , the pause table helps dogs learn patience and self-control. For budget DIY options, PVC pipe offers an affordable material for building a sturdy pause table.
Some key considerations for a DIY pause table include:
- Size – A 3′ x 3′ or 4′ x 4′ square works well.
- Height – Adjustable legs allow customizing the height as your dog grows. Aim for a competition regulation height of 16 inches.
- Surface – Add a non-slip rubber mat or artificial turf for traction.
- Stability – A wider base prevents tipping. Bracing or an H-frame provides sturdiness.
PVC fittings like elbows, tees, and crosses connect the frame pipes. End caps on the legs prevent sharp edges. Spray paint adds color for visibility. Weighted buckets or sandbags hold the legs in position for adjustable heights.
For step-by-step instructions, refer to the PVC Dog Agility Pause Table Plan. This customizable design uses common materials for an affordable DIY solution. Get creative with PVC pipe to build a sturdy pause table on a budget!
Safety Tips
When building your own agility equipment, safety should be the top priority. Homemade equipment poses more risks than professionally built equipment, so it’s important to take precautions. Here are some tips for keeping your DIY agility equipment safe:
Use soft materials like foam or padding on contact equipment. Hard surfaces can hurt a dog’s joints on impact. Add layers of foam or turf on surfaces like the A-frame and teeter (Carlson Agility).
Avoid using treated wood, which can contain chemicals. Opt for sanded plywood, or seal untreated wood (AgilityNerd).
Smooth out edges and corners. File down or sand any rough edges to prevent splinters. Round sharp corners on jumps and other equipment.
Check stability and reinforce as needed. Make sure surfaces are level. Secure joints with corner brackets. Weigh down equipment bases.
Use breakaway jump cups. They release when hit, reducing risk of injury. On other equipment, look for potential failure points and reinforce them.
Start low and slow. Keep jump heights and inclines low when first introducing equipment. Only increase height as dogs develop skills and confidence.
Watch and inspect often. Routinely check equipment for wear, splintering, loosening, or other safety issues. Monitor dogs closely when using equipment.
Fun Backyard Courses
Creating a DIY agility course in your backyard can be a fun project for you and your dog. With some simple equipment and a bit of creativity, you can design a custom course that will provide mental and physical stimulation.
For small backyard spaces, consider a simple course with a few jumps and tunnels. According to this source, you can use boxes or low hurdles for jumping exercises. PVC piping or flexible tunnels made from sheets or tarps can create tunnels to run through. Arrange the equipment in different sequences to create new challenges over time.
Bigger backyards allow for more elaborate courses. An example design from this DIY agility course page uses jumps, ramps, tunnels, weave poles, and elevated walkways. Space equipment far enough apart for dogs to build speed and fully complete each obstacle. Make sure to include straight pathways as well as curves and turns to practice different movement skills.
When designing your DIY backyard agility course, start simple and expand over time. Focus on portable, easy-to-move equipment. Rotate through different arrangements regularly to keep your dog engaged. And be sure to keep safety in mind by using lightweight materials and supervising your dog during backyard agility sessions.